
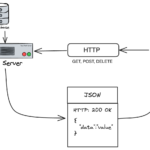
WebSockets provide a two-way communication channel over a single, long-lived connection. Implementing WebSockets API with Django Channels allows for real-time interactions between clients and servers, making it a powerful tool for building dynamic and interactive web applications. In this context, APIs and web services play a crucial role in facilitating communication and data exchange between the client-side application and the server-side Django Channels application. By utilizing Django Channels, developers can extend the capabilities of Django to handle asynchronous tasks and real-time updates through WebSockets, enhancing the user experience of their web applications. This integration of WebSockets API with Django Channels offers a seamless and efficient solution for implementing real-time features in web services, providing a foundation for creating responsive and interactive web applications.
In modern web applications, real-time communication is essential for enhancing user experience. To achieve this, WebSockets provide a robust solution, allowing two-way communication between clients and servers. In this article, we will explore how to implement a WebSockets API using Django Channels. We’ll guide you through the setup and coding necessary to establish real-time functionalities in your Django applications.
What are WebSockets?
WebSockets is a protocol providing full-duplex communication channels over a single TCP connection. This allows for the real-time transfer of data, making it ideal for applications like chat rooms, live notifications, and collaborative editing tools. Unlike traditional HTTP requests, WebSockets maintain a constant connection between the client and server, enabling instantaneous message transmission.
Understanding Django Channels
Django Channels extends Django’s capabilities to handle asynchronous protocols like WebSockets. With Channels, you can manage real-time communication alongside typical HTTP requests, making it a powerful addition to your Django project.
Setting Up Your Django Environment
To start implementing WebSockets with Django Channels, first ensure you have a Django project. If you don’t have one set up yet, follow these steps:
pip install django
django-admin startproject myproject
cd myproject
Next, install Django Channels by running:
pip install channels
After installing Channels, add it to your INSTALLED_APPS in the settings of your Django project:
INSTALLED_APPS = [
    ...
    'channels',
    ...
]
Configure the ASGI File
Django traditionally uses WSGI, but with Channels, you need to configure your ASGI settings. Create a file named asgi.py in your project directory:
import os
from django.core.asgi import get_asgi_application
from channels.routing import ProtocolTypeRouter, URLRouter
from channels.auth import AuthMiddlewareStack
from myapp import routing

os.environ.setdefault('DJANGO_SETTINGS_MODULE', 'myproject.settings')

application = ProtocolTypeRouter({
    "http": get_asgi_application(),
    "websocket": AuthMiddlewareStack(
        URLRouter(
            routing.websocket_urlpatterns
        )
    ),
})
This configuration allows your application to route HTTP and WebSocket connections appropriately.
Creating Your Channels Routing
Next, create a file named routing.py in your Django app directory (myapp) to define the routing for the WebSocket connections:
from django.urls import path
from . import consumers

websocket_urlpatterns = [
    path('ws/chat//', consumers.ChatConsumer.as_asgi()),
]
Developing the WebSocket Consumer
Now, let’s create a consumer that handles WebSocket connections. Create a file named consumers.py in your Django app directory:
import json
from channels.generic.websocket import AsyncWebsocketConsumer

class ChatConsumer(AsyncWebsocketConsumer):
    async def connect(self):
        self.room_name = self.scope['url_route']['kwargs']['room_name']
        self.room_group_name = 'chat_%s' % self.room_name

        # Join room group
        await self.channel_layer.group_add(
            self.room_group_name,
            self.channel_name
        )

        await self.accept()

    async def disconnect(self, close_code):
        # Leave room group
        await self.channel_layer.group_discard(
            self.room_group_name,
            self.channel_name
        )

    # Receive message from WebSocket
    async def receive(self, text_data):
        text_data_json = json.loads(text_data)
        message = text_data_json['message']

        # Send message to room group
        await self.channel_layer.group_send(
            self.room_group_name,
            {
                'type': 'chat_message',
                'message': message
            }
        )

    # Receive message from room group
    async def chat_message(self, event):
        message = event['message']

        # Send message to WebSocket
        await self.send(text_data=json.dumps({
            'message': message
        }))
This consumer implements methods for connecting, disconnecting, receiving, and sending messages through WebSockets. It allows messages to be sent and received within the same chat room.
Setting Up Channels Layer
Django Channels allows you to handle channel layers, which enable different processes to communicate. For simplicity, we will use the in-memory channel layer, but in a production application, you would want to use something like Redis for better performance and scalability.
Install the channels Redis package:
pip install channels_redis
Then update your settings.py to configure the channel layer:
CHANNEL_LAYERS = {
    'default': {
        'BACKEND': 'channels_redis.core.RedisChannelLayer',
        'CONFIG': {
            "hosts": [('127.0.0.1', 6379)],
        },
    },
}
Creating Frontend WebSocket Connection
To interact with your WebSocket consumer, you need a frontend implementation. Here’s a simple example using JavaScript:
<script type="text/javascript">
    const roomName = "testroom"; // Replace with your room name

    const chatSocket = new WebSocket(
        'ws://' + window.location.host + '/ws/chat/' + roomName + '/'
    );

    chatSocket.onmessage = function(e) {
        const data = JSON.parse(e.data);
        document.querySelector('#chat-log').value += (data.message + '\n');
    };

    chatSocket.onclose = function(e) {
        console.error('Chat socket closed unexpectedly');
    };

    document.querySelector('#chat-message-input').focus();
    document.querySelector('#chat-message-input').onkeyup = function(e) {
        if (e.keyCode === 13) { // Enter key
            const messageInputDom = document.querySelector('#chat-message-input');
            const message = messageInputDom.value;
            chatSocket.send(JSON.stringify({'message': message}));
            messageInputDom.value = '';
        }
    };
</script>

<textarea id="chat-log" cols="30" rows="10"></textarea>
<input id="chat-message-input" type="text" size="100">
In this HTML snippet, we establish a WebSocket connection, listen for incoming messages, and send messages when the Enter key is pressed.
Running Your Django Project with ASGI Server
To run your Django project with WebSockets enabled, use Daphne, which comes with the channels package. Install it if you haven’t already:
pip install daphne
Then start the application using:
daphne myproject.asgi:application
Visit your chat page, and you should be able to send and receive messages in real time!
Conclusion
Implementing WebSockets API with Django Channels greatly enhances the interactivity of your web applications. You’ve learned how to set up a basic WebSocket API, create consumers, and manage real-time communication effectively. By utilizing Django Channels and WebSockets, you can build responsive, real-time applications that significantly improve user engagement.
Implementing WebSockets API with Django Channels allows for real-time communication between clients and servers, enhancing the interactive and dynamic nature of web applications. By utilizing this technology, developers can create highly responsive and engaging web services that provide immediate updates and notifications to users. This integration expands the functionalities of traditional RESTful APIs by enabling bidirectional communication, making it ideal for applications that require instant data synchronization and interactive features.
Related posts:
 How to Implement API WebSockets with NestJS
 The Difference Between API SDKs and API Wrappers
 How to Implement API Response Caching with Varnish
 How to Build a Headless CMS API with Strapi
 How to Use the Notion API for Task Management Automation
 How to Use the OpenWeather API for Real-Time Air Quality Monitoring
 How to Build an API That Supports WebRTC for Live Video Calls
 How to Use the NASA API for Space Data Integration
 How to Implement API Access Management with OAuth Scopes
 How to Use the Notion API to Automate Project Management
 How to Implement API Request Prioritization with Queues
 How to Build an API That Supports Biometric Authentication
 How to Implement API Connection Pooling for Database Efficiency